
Building your first widget - Step 2
In step 1 we created the widget extension target & got it running on the simulator. Now let’s look at the basic parts of a widget.
You’ll notice that Apple created a folder with your widget name & made a template file for you there. Let’s take a look at this template’s contents - it consists of 4 structs:
Before we dive into each struct’s purpose, I think a quick overview of all 4 will give us some good context. The SimpleEntry struct is basically a view model for the widget, containing (at minimum) a date stamp to help iOS know if the widget is up to date or needs refreshing - note that you’ll probably add more properties to this object in order to display additional data in your widget. The Provider struct’s purpose is to retrieve data for your widgets while they are in various states. The WidgetExtensionEntryView is more or less the root view of your widget. Lastly, the WidgetExtension is the main entry point of the widget & composes the WidgetExtensionEntryView, Provider, and SimpleEntry. Don’t worry if you still want more info on any of the objects, we’re about to dig in.
The first struct is named Provider and conforms to TimelineProvider. This provider object has three purposes:
Provider purpose 1. To make an entry for the widget “placeholder” state:
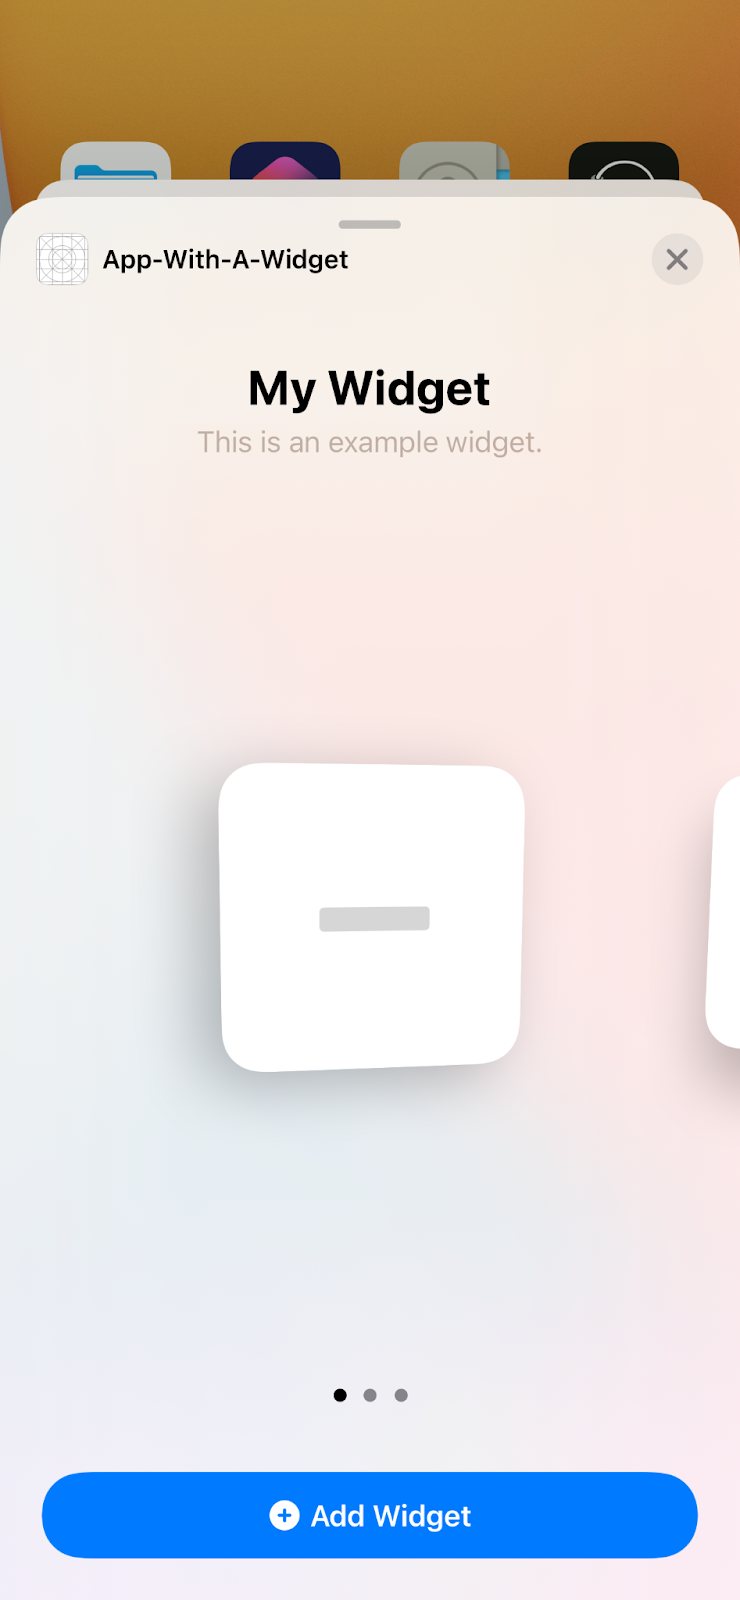
Placeholders are basically the loading state of the widget, so this method has to return some value instantly rather than using a callback. Deciding what data to pass to a placeholder is interesting, since all of the SwiftUI views are “redacted” or blanked out (any text will be replaced with boxes tinted with the color of the text). You can preview what this looks like on any view if you add the `.redacted(reason: .placeholder)` modifier to a view. Behind the scenes, this modifier is added to your widget when it’s in the placeholder state. If you want your placeholder view to have certain colors or a specific layout, you could pass a true/false `isPreview` flag in the entry returned from this method, and then do something in the SwiftUI views based on that flag. Here’s an example of a widget placeholder - note the grey box is a Text view that’s being automatically redacted:
Provider purpose 2. To get an entry for the widget “snapshot” state.
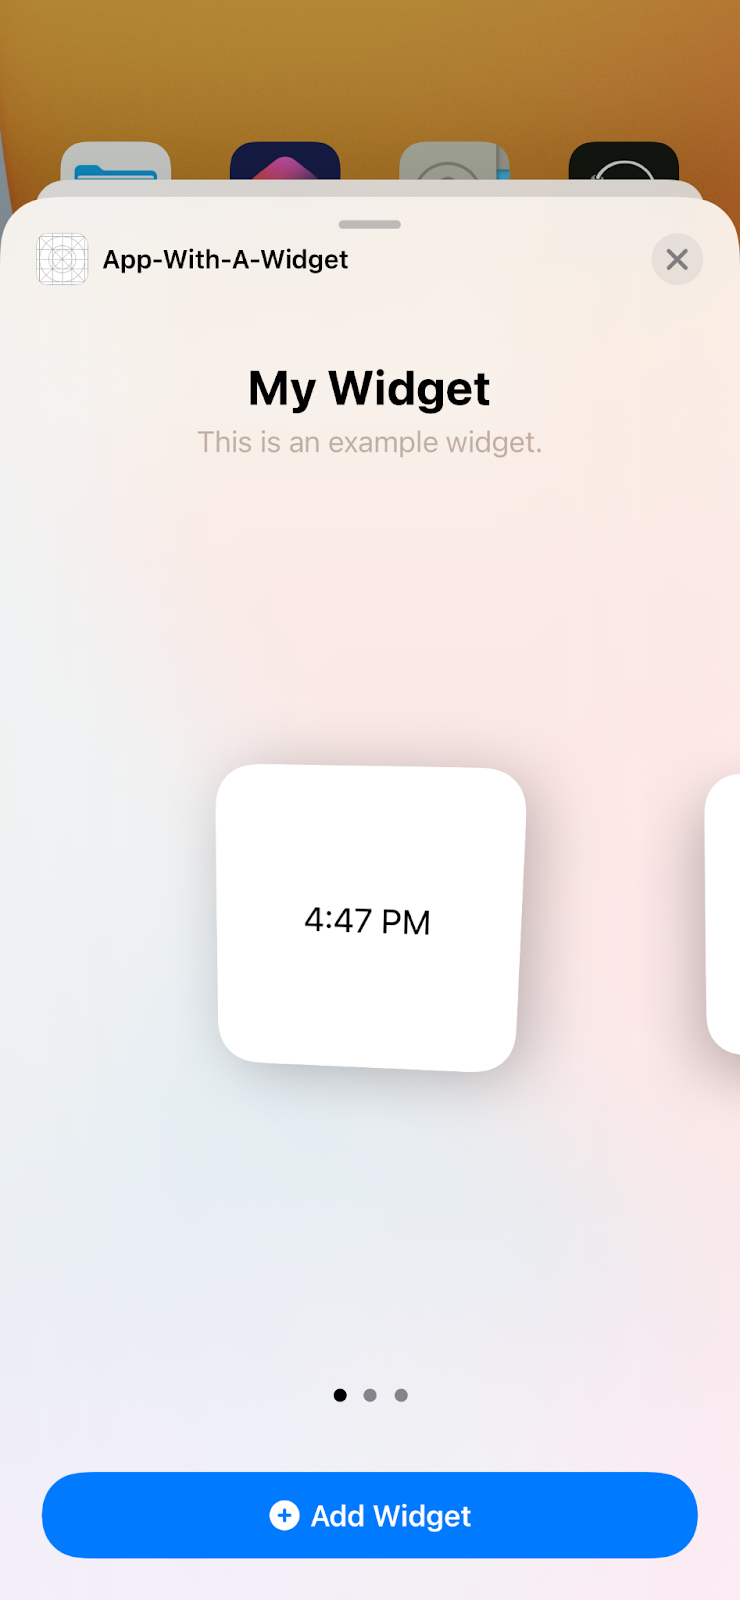
Widget snapshots are previews of the widget, and they’re shown when the user is going to add a widget to their home screen. Notice that you return the snapshot entry using a completion handler so you have time to access Core Data or make a network call. Apple recommends calling the completion as quickly as possible to improve the user experience, and I’ve seen many apps just display generic data here, simply using images bundled with the app for the sake of speed. The final decision is really up to you.This Here’s an example a widget snapshot:
Provider purpose 3. To retrieve a timeline (which is a list of entries) for the widget.
This is where the widget data comes from when a user places the widget on their home screen. Once you’ve retrieved any necessary data from Core Data, the network, etc., you create entries and put them in a timeline, then pass that timeline to the completion handler. Don’t worry, there will be another post on the details of entries, timelines & reload policies. For now, let’s continue with the rest of the template.
One final note - it’s probably a good idea to rename this struct since “Provider” is pretty generic. I talk about this a bit more at the end of the article.
So the Provider was a bit complex, how about we discuss the SimpleEntry now?
As you can see, this part is pretty, well...simple. As mentioned earlier, the SimpleEntry is used as a view model for our widget. To conform to TimelineEntry, it must have a `date` property. This is used internally by iOS to check for any widget updates or refreshes. In order to pass additional data to your widget (I assume you want to display more than a date in your widget) you can add more properties to this SimpleEntry. I prefer to create a WidgetViewModel type and store it in the entry, so that my widgets can access it later in the process.
Now for the WidgetExtensionEntryView.
This will be the starting point of all your widget’s views. Remember to use composition in SwiftUI and break down your UI into reusable parts. This comes in handy when you’re building small, medium, and large size widgets. By the way, how will we show a different UI for each of these sizes? I’m glad you asked! Apple provides us an environment variable called widgetFamily to help us out here. Once we check the current widget family, we can select between our different widget sizes. Here’s an example:
How cool is that? Now each widget size can display a completely different UI. Notice I left the default case in there - without it we see a warning that more cases could eventually be added. Now let’s add a couple SwiftUI previews so we can be sure the widget UI changes with each size. Find the ExampleWidget_Previews struct down at the bottom of the file and replace it with this:
Now press command + option + enter to open the SwiftUI preview panel (if it’s not already open). Sometimes you need to refresh the preview to see your changes, if that’s the case just press command + option + p while the preview panel is open. You should see something like this:
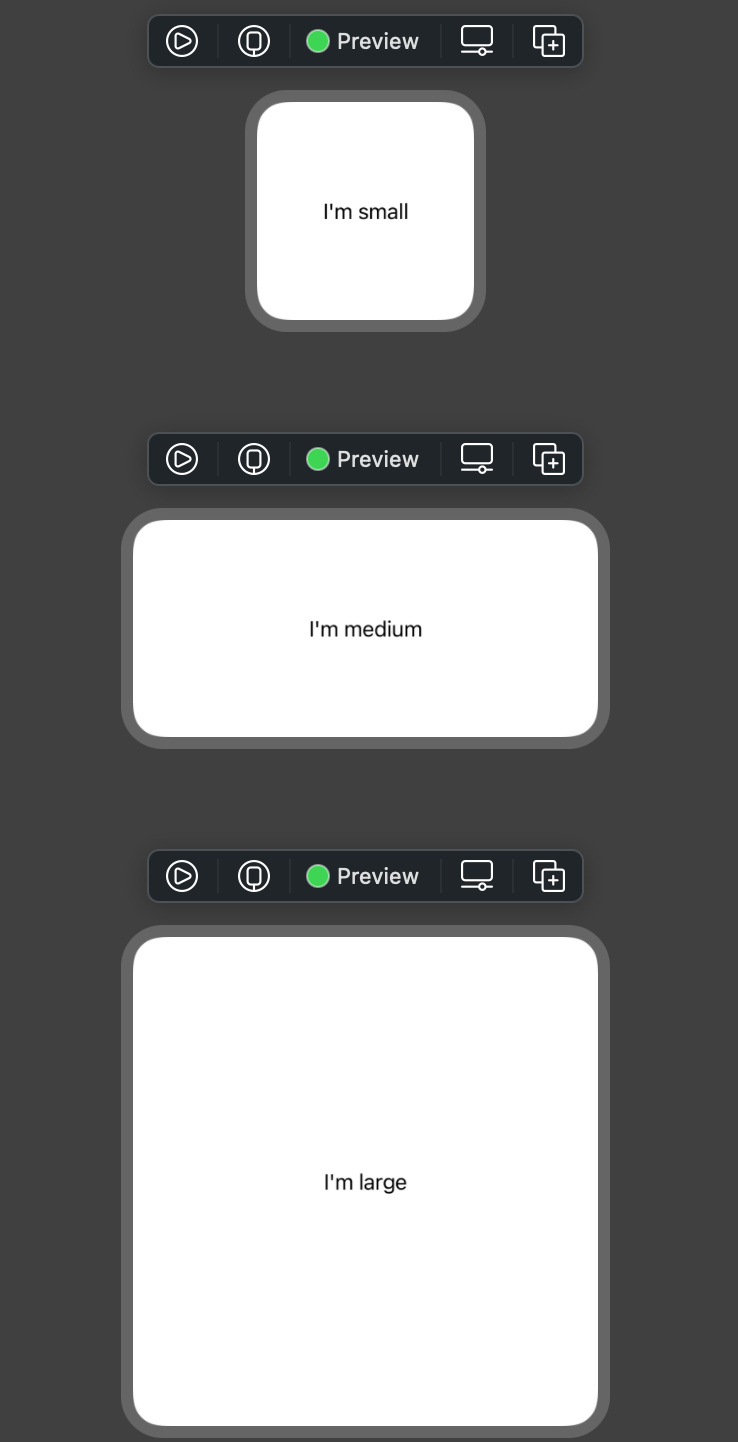
Great! We’re on our way to creating a widget that dynamically changes based on its size. You can see how powerful this is if you want to show different layouts for different sizes.
Last of all, let’s take a look at the ExampleWidget struct that Apple created for us:
The `@main` declaration before the struct means this is the entry point for your app’s widget experience. This is where you can define multiple widgets for your app (a topic for a future article), and let iOS know if users can configure your widgets. The Widget protocol just requires a body variable to return a WidgetConfiguration. Since we unchecked “Include Configuration Intent” when creating this widget extension, Apple created a StaticConfiguration (which means the user can’t customize the widget by doing a long press & tapping “Edit widget”). Don’t worry, I’ll go over how to use the IntentConfiguration version in a future post.
The `kind` variable isn’t necessary, but Apple created it so you notice it a bit easier. In the `StaticConfiguration`, the `kind` parameter is a string that identifies this widget. You’ll use that string to reload this particular widget from within the app (don’t worry, we’ll get there in the next article). The `provider` parameter just takes an instance of your provider object that we talked about earlier, and the trailing closure is where you pass each entry generated by the provider into the ExampleWidgetEntryView. Lastly, there are `configurationDisplayName` and `description` modifiers that show up when the user is adding the Widget to their home screen:
And that’s it for the widget template code! Hopefully taking the time to look at each aspect of it will help you understand how to move forward and customize your own widgets. One last note before we end - you may want to break out each of these structs into their own files with appropriate names. That’s typically what I like to do just for the sake of organization (though it is nice that Apple creates the template in a single file so you initially can see the parts all working together). Along with that, hopefully you rename these structs in your own project - I don’t know about you but Provider and SimpleEntry are a little too generic for my taste. Maybe prefix them with the widget’s name, for example BatteryWidgetProvider and BatteryWidgetEntry, whatever makes sense to you.